This week, I thought I'd show you all how I draw AJ-style eyes! The eyes are really one of the most notable and easily recognizable features on AJHQ's art, and they happen to be my favourite part! Now, there's no correct method of doing this - whatever gets you to the end result is perfectly A-okay! I just thought I'd show you how I, personally draw them!
I typically start this on paper and draw traditionally, and then copy that image over to my computer, and do the rest of the art digitally. For the sake of ease, though, I'll be doing this one completely digitally. Make sure that you do each step in a separate layer!
My first step is to draw two curved lines. Note that depending on the animal, the lower lid of the eye may be steeper, flatter, inverted, or the entire eye shape might be flipped! I'll just be doing the eye shape most commonly seen in AJ's art. These two curved lines will make up the base lines for your eye:

Next, I add another curved line so that the inside of the eye has a sort of- semi-lunar shape (if that makes any sense). Where you draw this line depends on where you'd like your character to be looking!

Next, I choose the basic colour I want for the eye. I chose green for this one, since it's my favourite colour- and I find it to be really easy to work with! Colour the smaller part of the eye with your colour, and the rest black. I use the paint-bucket tool for this step!

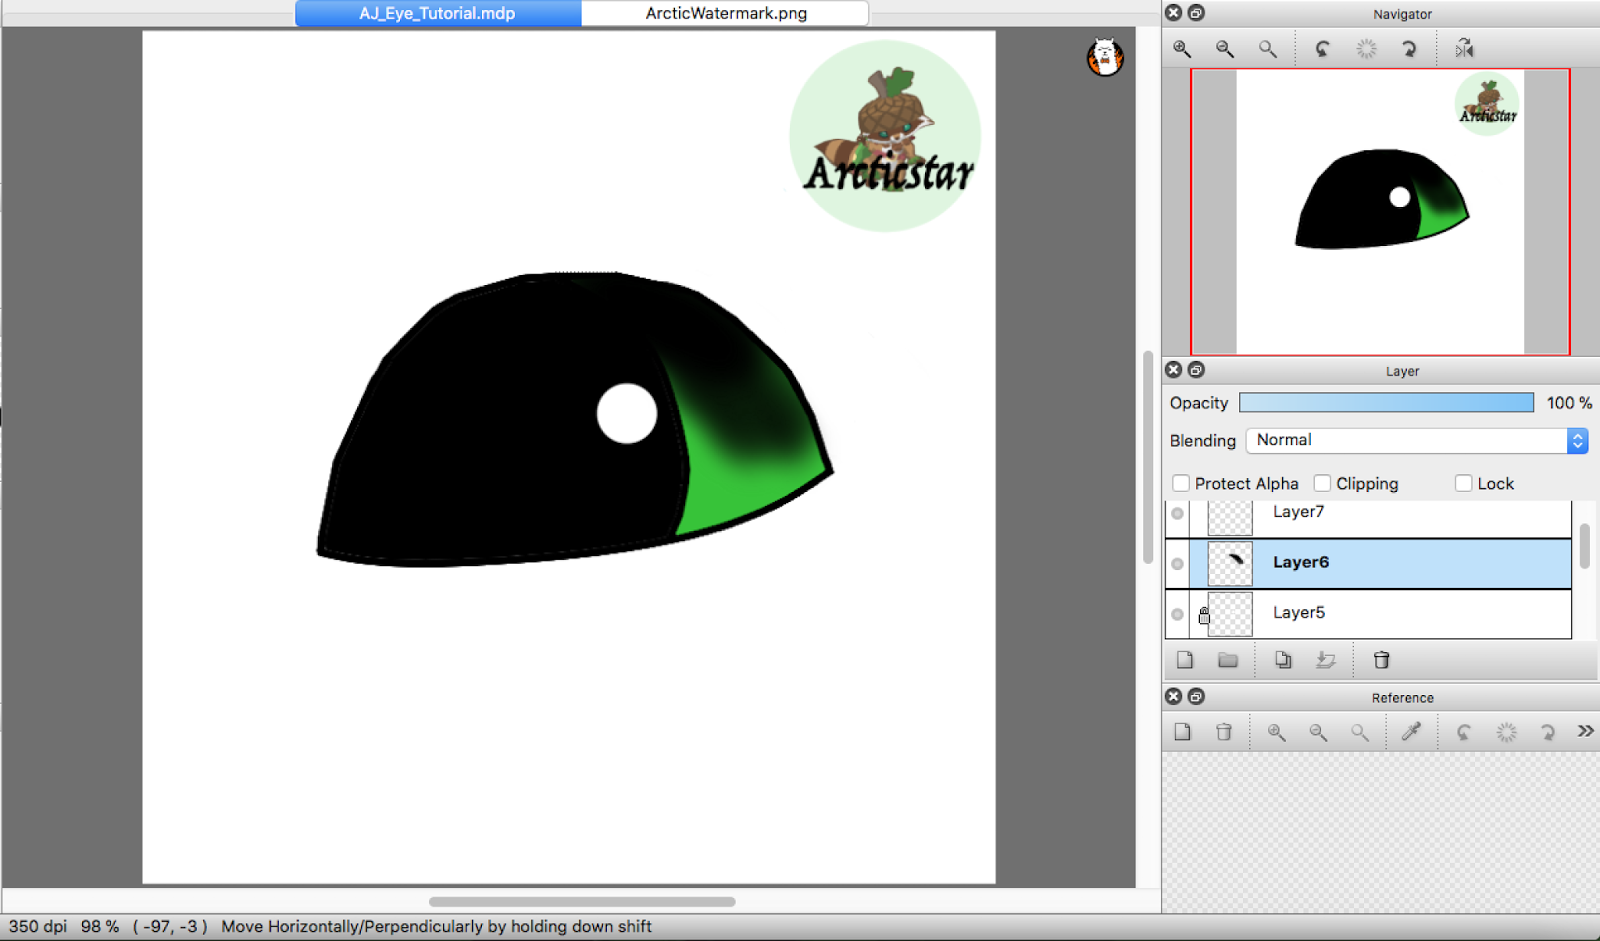
Then, change your paint colour to white and put a single dot on your eye (near the coloured part):

We're getting close, but here comes the final, very very important part. Take your airbrush tool and set the paint colour to black. Then, carefully colour along the inside of the coloured part of the eye in a curved motion. Make sure that the narrowest part of the eye is the darkest!
But Arctic, you may say: This looks terrible! Why is my eye so dark? Well, my friend - that's because we aren't quite finished yet. We still have to turn the opacity down on this layer. Depending on what art software you use, the location of this feature may be different - mine is located on the right hand side. How much you turn it down really depends on the eye colour and how much black you used. I set this one to 50%, but I've gone lower than that one other pieces (especially lighter coloured eyes!)

And there you have it! Pat yourself on the back- you've just completed an AJ-style eye!
I really hope this was interesting/helpful! If you'd like any tips, I'll do my best to help!
That's all for this week, folks- see you around!

Go and be golden!
Thanks Arctic! I should try this- looks like it'd help!
ReplyDeleteOo yes! Awesome Arctic! :D This will be superrrrrrrrrrrrrrrrrrrrrrrrrr helpfuL!
ReplyDeleteThat eye is so cute! :O Good job!
ReplyDelete-Koolestkat